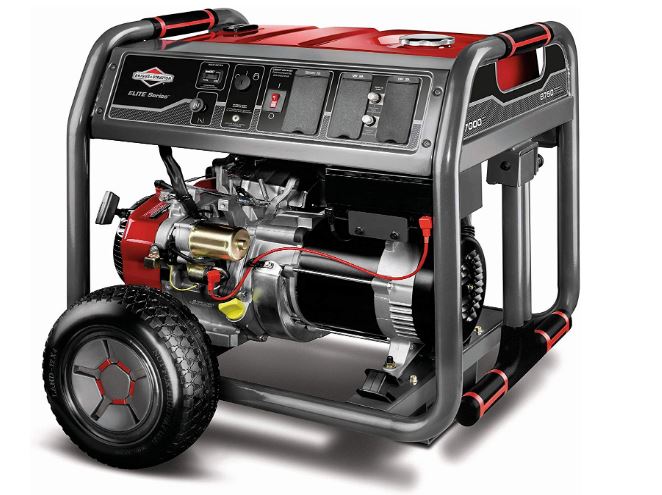
A portable generator is an essential thing to have in your home. It serves as a core component when planning for emergency preparedness, or wanting to have a power backup system. It doesn’t matter what type of generator you have, the quality of the power supply will be really good to run most machines.
Many people don’t have an idea when it comes to connecting a portable generator to an electrical panel. In this article, we’ll learn how exactly you need to connect your generator to an electrical panel with step-by-step instructions.
Let’s get started.
What’s the proper way to power your home?
A generator transfer switch is the proper way to power your home with an emergency generator. You can connect your portable generator to an electrical panel in three ways.
- Automatic transfer switches. These switches will recognize a power loss and start your standby generator automatically, and they even move the load to the generator efficiently. It is an awesome feature, but this type of powering is way more expensive and you need to have a full-time standby generator.
- Manual transfer sub-panel switches. It is a good option and it is less expensive than the automatic transfer switches. You can use it to power your portable generator. They will only cover a few breakers.
- Breaker interlock. Breaker interlock is the least expensive of all and a perfect option for most homeowners. It is also a flexible option to set up. You can run basic appliances with the breaker interlock connection.
Now that you know what are the options available when it comes to connecting your portable generator to an electrical panel, it’s time for you to learn how to connect your generator to the panel in order to power your home.
How to connect a portable generator to an electrical panel?
In this section, we’ll learn step-by-step instructions on what you need to do to connect your portable generator to an electrical panel using the breaker interlock method. After completing this section, you will be able to implement the learning easily and effectively.
Step 1. Don’t use a double male plug:
We’ve seen people using a double male plug to energize their homes when there is a power outage. It’s dangerous. Here’s why.
- The power created by the generator is generally greater than the rating for receptacles, wires, and breakers. Hence, it is a fire hazard.
- If you don’t disconnect your main breaker, it can shock anything.
- Even you can get shocked because the male plug prongs are exposed and not covered properly.
Step 2. Determine your generator’s plug type and amperage:
First up, you need to figure out what type of amperage and plug type you need for your generator. Ideally, go for a big round plug. This will provide power for both sides of the breaker box. You will see the amperage written near the plug.
Step 3. Get the supplies ready:
The following is a list of supplies you need to connect your generator to an electrical panel the right way.
- Breaker interlock kit. Buy a UL-rated kit that fits into your breaker box.
- 30-amp two-pole double breaker. Again, buy one that fits your breaker box.
- Buy at least 10 ft in length and 10 gauge of wire. Buy them in separate colours if needed.
- 30-amp power inlet box.
- Conduit body.
- Conduit glue.
- 30amp generator extension cord.
Note: we use 30amp output. So we’ve listed all the amperage in exact match. If you use a different output on your generator, then you should buy that particular amperage supply.
Step 4. Drill an access hole:
You need to drill an access hole. Using a hammer drill, the process will become much easier. try to drill the hole as close as possible to the electric panel so that you can connect the generator easily.
Step 5. Mount the power inlet box:
Remove the front cover of the power inlet box and attach the PVC fitting. Use a watertight connecter instead of glue because it’s easy to do it so. Using a tap can mount the power inlet box to the wall.
Step 6. Test fit and the glue conduit:
Use a hack saw and cut the conduit to the exact length you want. Don’t glue it until it fits. Once you know it fits perfectly, glue it down.
Step 7. Wire the generator inlet plug:
Once the glue is dry, you can start to work on the wiring. Remove the cover on the conduit body. Pull the wires through one at a time attaching them to the inlet plug. Remove about three or fourths of an inch of insulation. Use a large screwdriver or a nut driver to tighten the terminals.
Step 8. Push the wiring inside:
Push the wires through the conduit into the house one at a time. Replace the conduit body cover, checking the proper fit of the gasket. Fill any gaps between the conduit and your house with expanding foam.
Step 9. Prep breaker box for wires:
Turn all the branch breakers and the main power breaker. Remove the front panel of the breaker box by taking out the fore screws. Remove one knockout and screw the conduit adapter. Pull the wires into the conduit into the breaker box.
Step 10. Create an open breaker space:
The breaker interlock method requires that the to most upper and the right breaker space to be free. Generally, you may need to move a breaker or two down. Most boxes will have enough space to move things a bit.
Step 11. Install generator breaker and wires:
Install the new breaker in the freed-up space of your breaker box. Distribute the wires for the two terminals. Also, distribute wires to the common rail bond in the box and the ground rail.
Step 12. Install the breaker retainer:
Now it’s time for you to lock down the breaker from moving. Install the retaining bracket. The main bolt should be located between the main breakers and the 30-amp breaker.
Step 13. Install interlock on panel cover:
Flip the cover over and use the provided template. Pre-drill the holes and finish them with the bit size. Turn the panel back over and install the sliding interlock bolts.
Step 14. Operation test:
Time to load test! Conform power outage and start the generator ensuring normal operating speed. That’s it!
See also: 4 Reasons Why You Should Consider Getting a Generator
Conclusion:
That’s all to it when it comes to connecting your generator to an electrical panel.
Want to say something? Add your thoughts in the comments section below.


